Supplies
Hard Cover Journal, Tag, ATC or Cardstock
Gesso
Molding Paste (I used Golden's Light Molding Paste)
Alcohol Ink (As many colours as you would like to combine)
Blending tool
Clean felt pads
Popsicle stick

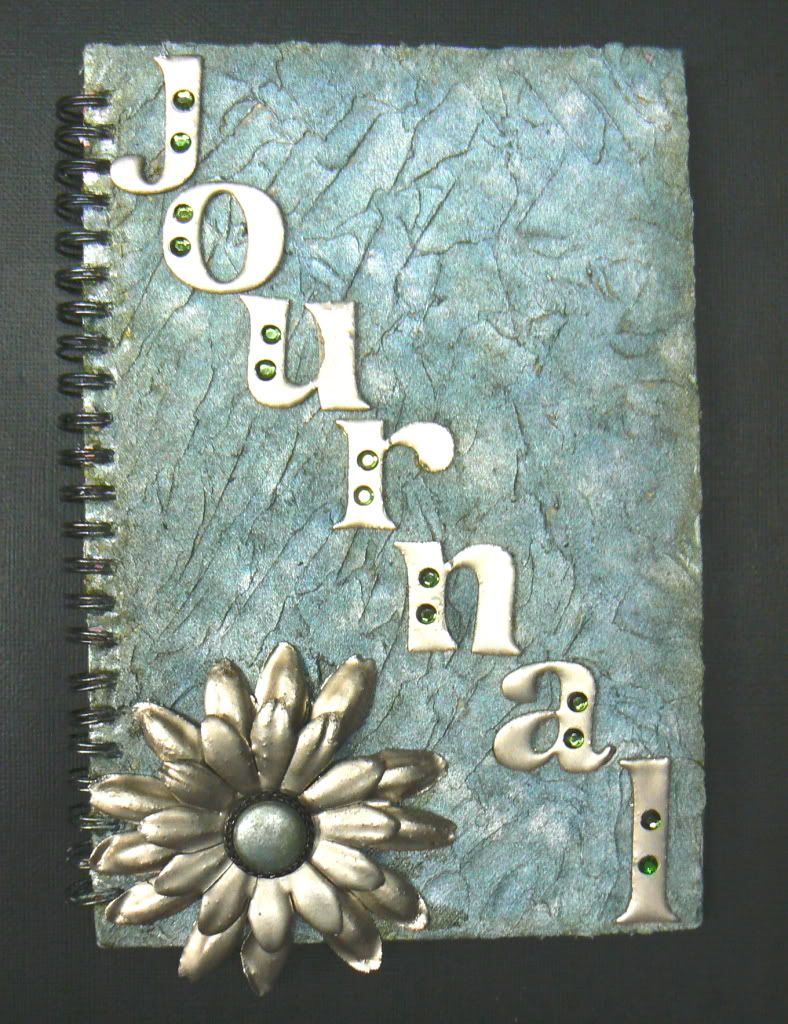
Step 1 - Gather all your supplies together. You can use this technique as I have on a journal cover or something a lot simpler, like a background for an ATC or tag or even on some inchies.

Step 2 - Place your journal/ATC/tag on your non-stick craft mat and paint over the entire surface with white acrylic gesso. This acts as a primer for the paste. Looking back I would've covered my ring binders with masking tape during this and the next step to avoid getting paste on the rings.

Step 3 - Using your popsicle stick apply the paste to your surface creating peaks and folds or any other textured surface you desire. The paste is very slow drying so you will have ample time to play around creating the finished look you want. Once you're happy with the texture, put your project aside where it can dry. This can take up to 24 hours so only use this technique when you're not in a hurry.
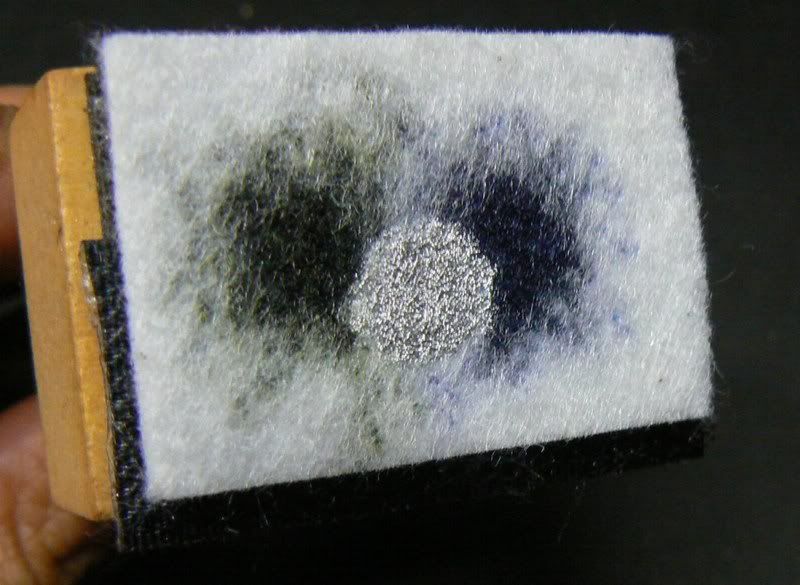

Step 4 - Once your paste is completely dry you can move your project back to your craft mat. Using the blending tool with a clean felt pad, add your selected colours of alcohol ink. For my project I used stonewash, pesto and some silver mixative. Dab the tool over the surface in and stamping motion.


Step 5 - Continue adding alcohol ink to the pad and stamping until the entire surface is covered in the colours and patterns you desire. Here is a close-up of my colour combination on the surface. Remember to pay close attention to the peaks and folds and ensure that you have covered all the gaps with your ink.
Once your surface is fully inked, you can leave to dry or use your heat gun to dry. Now you have a fabulous background to create a stunning project against.
No comments:
Post a Comment